3D Blu-ray backup to 3D TV & VR Meta Quest

- Update 15th July 2025
Firstly as an avid fan of 3D Film / Spatial Video, I have uploaded 3D footage to my YouTube account. Here you can watch 3D content I’ve recorded at concerts, walking tours and just general videos. I will cover the methods I’ve used to record this using my iPhone later on in my Substack website. If you’ve found my videos through this website please drop a message in the comments! Thanks!
Seb’s 3D and Spatial Video Playlist on YouTube
Contents of post -
Method 1 : Quickest, Largest file size (No compression lost) MKV
Include Director / Writers / other commentary audio from other Blu-ray discs
My Background History with 3D Cinema
Having purchased a 3D TV at the backend of the 3D cinema-going heyday, where almost every action movie had a 3D Stereo conversion cinema release, I ended up picking up some 3D Blu-rays to watch with friends. Originally I would watch them on an Xbox One S. However, after Microsoft updated this model to the Xbox One series X, the 3D Blu-ray playback feature had been dropped. Sony had done the same with PlayStation 5 and it lost this feature, which the PS4 had on its release. Since then, the ways of being able to watch 3D movies had been dwindling - until VR started making a comeback.
Big Tech companies moved away from accessible VR like Google Daydream, Oculus Go and even Google Cardboard, however more recently, Meta and Apple peaked their stereoscopic interest and added fuel to the metaphorical VR bonfire by giving existing VR product makers1 a run for their money. Without digressing to the realms of virtual reality, a way I and many others enjoy experiencing VR is by watching 3D cinema.
Having experimented some capabilities of VR with the HTC Vive, Oculus Quest 2 and now Meta Quest 3, 3D Blu-rays have peaked my interest once again and I’ve been watching them via the headset and my notably older 3D TV.
The methods I use of converting 3D Blu-Ray to a watchable format on both the 3D TV and Meta Quest 3 are shared here. I’ve found out there are several ways to do this and I’ll explain a couple with some pros and cons. Just want to add that all these methods are free but you can also support the developers if you wish (and you should if you can afford to).
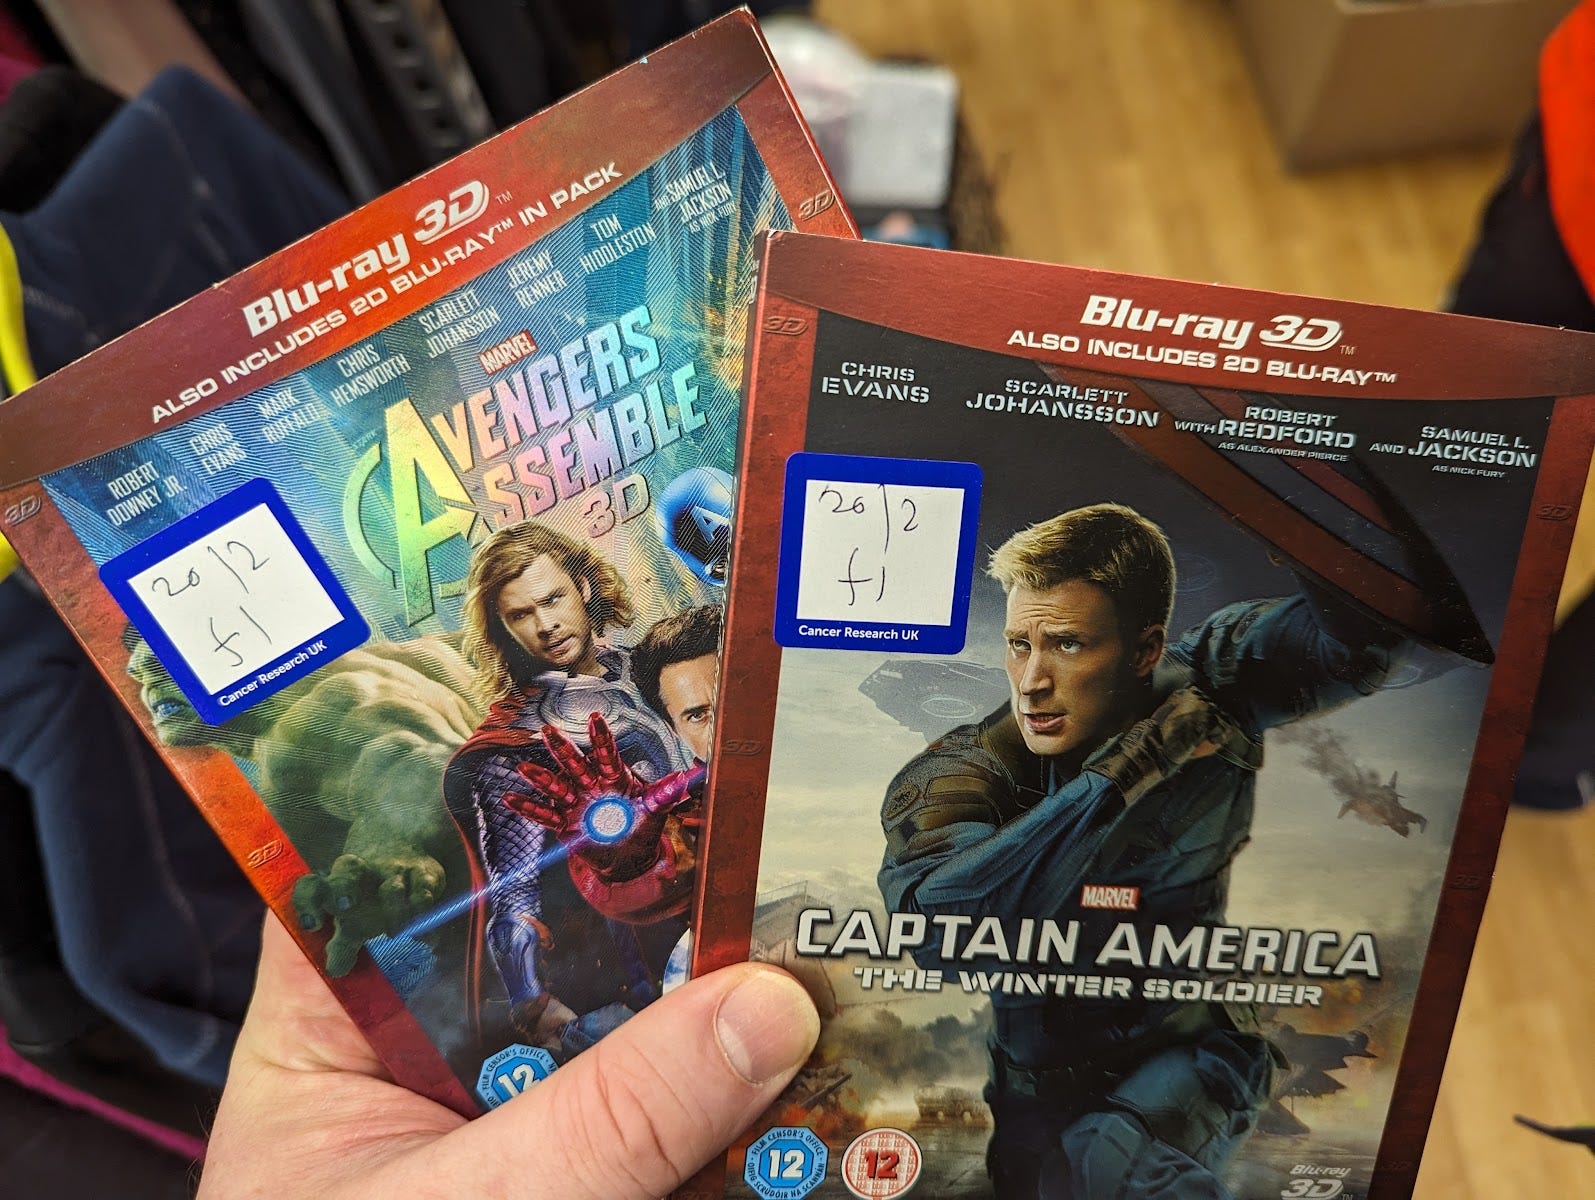
I Recently went to HMV on Oxford Street and asked one of their staff members if they had any 3D Blu-rays. “What’s a 3D Blu-ray?” was the response. This made me feel super old, as if I was asking for something equivalent to a VHS tape. I politely left. However, I have been luckier with charity shops and online retail sites so tend to buy there instead.
3D Blu-ray Ripping
Make MKV (Windows and macOS)
Make MKV has been in beta since I can remember. Don’t let this detract you and support the makers as I’ve done, especially if you use their software regularly (it’s $60). It gets updated every few months and works and has worked for years by ripping the blu-ray onto your hard drive.
If you want to RIP just the movie, audio track and subtitles I recommend following the steps immediately below. The help guides of MakeMKV are very helpful and include screenshots. I’ll also detail how to include the director/writer’s commentary if you have them available on a separate 2D disc later to add to the final video.
Open the disc in MakeMKV and wait to see its source file structure.
Only select the Title and subtree of Video, Audio, Subtitles and even cover art that you want to RIP - Usually Right clicking the top title and Unselect All, then selecting the chosen ones works best.
If you have a disc with many subtrees, look at the ones with the largest file size, (usually over 20GB and more than 1 chapter). The description below shows en example with the keyword ‘Stereo’ in the video file format. This is the 3D video you want to select.
Video Mpeg4 MVC High@L4.1/StereoHigh@L4.1Once MakeMKV has saved the video you can follow the next steps..
There are various guides online already2, but I added my own as it works for me.
Method 1 : Quickest, Largest file size (No compression lost) MKV
4XVR - Meta Quest Store - Pico Store
Load the ripped file onto your Meta Quest or Pico VR device, or stream access via the network support and just play and enjoy!
This app supports MVC 3D decoding in the following file formats: Blu-ray 3D ISO, SSIF, mkv, m2ts, ts, mts, etc.
MKV files ripped from the Blu-ray will play in 3D in this app on your VR headset.
Method 2 : Slower, Smaller file size, convert to Side by Side video (SBS) MKV (compressed video)
BD3D2MK3D - Windows only link -
BD3D2MK3D (or Blu-Ray Disc 3D to MKV 3D) - is a great app that let’s you adjust the ripped MKV and use video compression techniques to convert it to SBS (Side by Side) video format which will also play on different players (e.g. 3D TV’s, 3D projectors, VR apps).
There’s various tabs at the top of the app. Select each tabs sequentially as you need to choose what you want.
1: Open MKV/Blu-ray 3D
Make sure you have Switch to MakeMKV mode enabled, then row below, Open 3D MKV created by MakeMKV.
Load the MKV file
2: Select streams
Check the correct audio and subtitle streams are selected.
Convert the audio type to AC3 / AAC - Not all devices support AAC playback as its uses variable bitrate encoding, however it does compress better, producing smaller file sizes. Fortunately my TVs and VR both support it and this one works better for me.
For subtitles I choose 3D only and Blu-ray SUP
3: Titles & Tags
Movie title is mandatory as this affects the output filename. The rest of the details are optional.
4: Cover Art
Not mandatory but its possible to pull these from the MKV if you selected this during the ripping stage.
5: Options and Go!
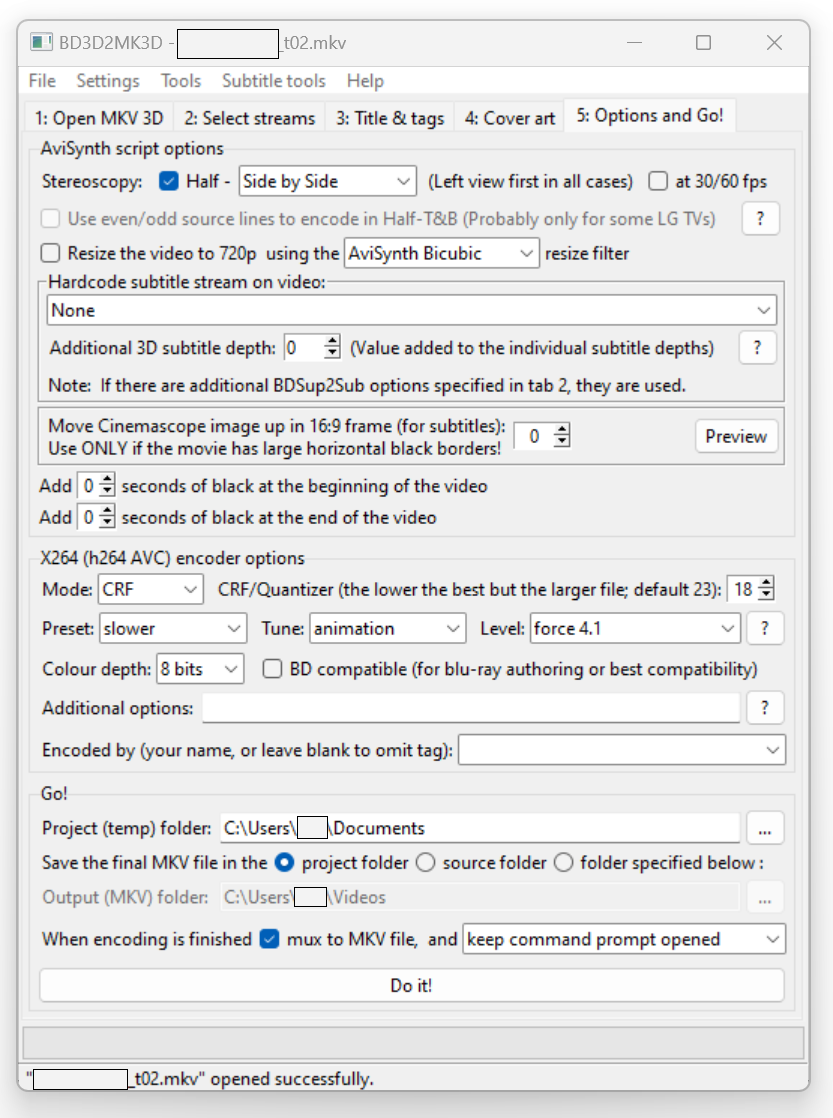
I choose Stereoscopy - Half as this works with my TV. I also choose the Side by Side option.
The X264 encoder options I use and work well for me are:
Mode : CRF
RF/Quantizer: 18
Preset : Slower
Tune: Film (for live action) or Animation (for CG animation)
level: force 4.1 this is the most compatible with hardware players.
Go!
When encoding is finished mux to MKV file -enabled - Don’t make the mistake of not enabling this like I did once.
Do it!
This runs all the options you chose and will demux the MKV.
Exit and encode after successful demux
In this popout, If you want to create the final MKV file when all the encoding is finished, enable this and it will compress the video and give or take an hour, you’ll have your final MKV output ready.
If you want BD3D2MK3D to batch encode a series of demux MKVs that you’ve ripped back to back, deselect this option. When complete, run the next MKV in BD3D2MK3D and repeat the process until you’re done with your collection. Only then should you choose the Batch Encode option in BD3D2MK3D and select the __ENCODE_3D.cmd files for each demux folder, whilst following the instructions which the app provides. It will then merge the left and right.

Including Director / Writer’s / other commentary
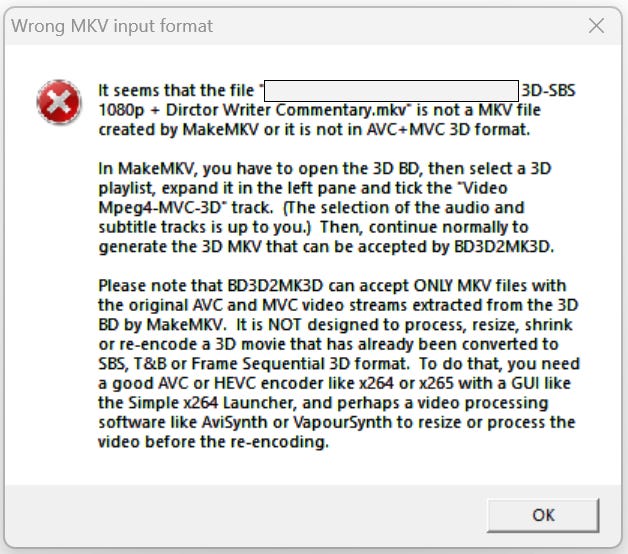
Most 3D Blu-rays do not include any audio commentary of sorts. However the 2D disc that they come with usually does. To add this or any additional commentary to the MKV video, it needs to be done after the BD3D2MK3D conversion is complete, otherwise BD3D2MK3D will recognise the MKV file is not an original created by MakeMKV and not in AVC+MVC 3D format and won’t work. You’ll need FFMPEG installed.
First RIP the audio commentary from the 2D Blu-ray disc with MakeMKV.
With FFMPEG installed, use the code below to extract the audio from the MKV file and output and convert to AAC audio format. As long as the only audio file in the ripped movie is the commentary, then the correct map command 0:1 will be the correct. If you’re not sure which it is, RIP all the audio tracks, and find which one it is.
ffmpeg -i 2DmovieRIP.mkv -map 0:1 audio.aaccommand map 0:1 selects the second stream in the MKV file. map 0:0 is usually the video stream, 0:1 first audio stream, 0:2 second audio stream, 0:3 might be the subtitle stream etc. - this may need to be changed when selecting a specific audio stream that you want to pull out for later adding on.
Next you need to add the audio commentary to the existing 3D MKV video and audio then output the file with two separate audio tracks:
ffmpeg -i 3DMovieRIP.mkv -i audio.aac -map 0 -map 1 -c copy 3DMovieRIPcommentary01.mkvNow you may want to label this audio stream so it labels it correctly when viewing on the player and output the file:
ffmpeg -i 3DMovieRIPcommentary01.mkv -map 0 -c copy -metadata:s:a:1 title="Director's Commentary" 3DMovieRIPcommentary02.mkv
Hope this all works well for you and you enjoy your 3D video collection once again! If you need help with FFMPEG commands here’s some useful material to read on the topic.3
Existing VR product makers such as PICO, HTC Vive, Valve Index, and Bigscreen Beyond
FFMPEG Documentation on Stream-selection and Mapping FFMPEG to the output file

Thanks for your support!